How to Create a Travel Itinerary (+ Free Template)
How to create a travel itinerary from scratch: a step-by-step framework, a time-blocking method for organizing each day, and a free copy-paste template.

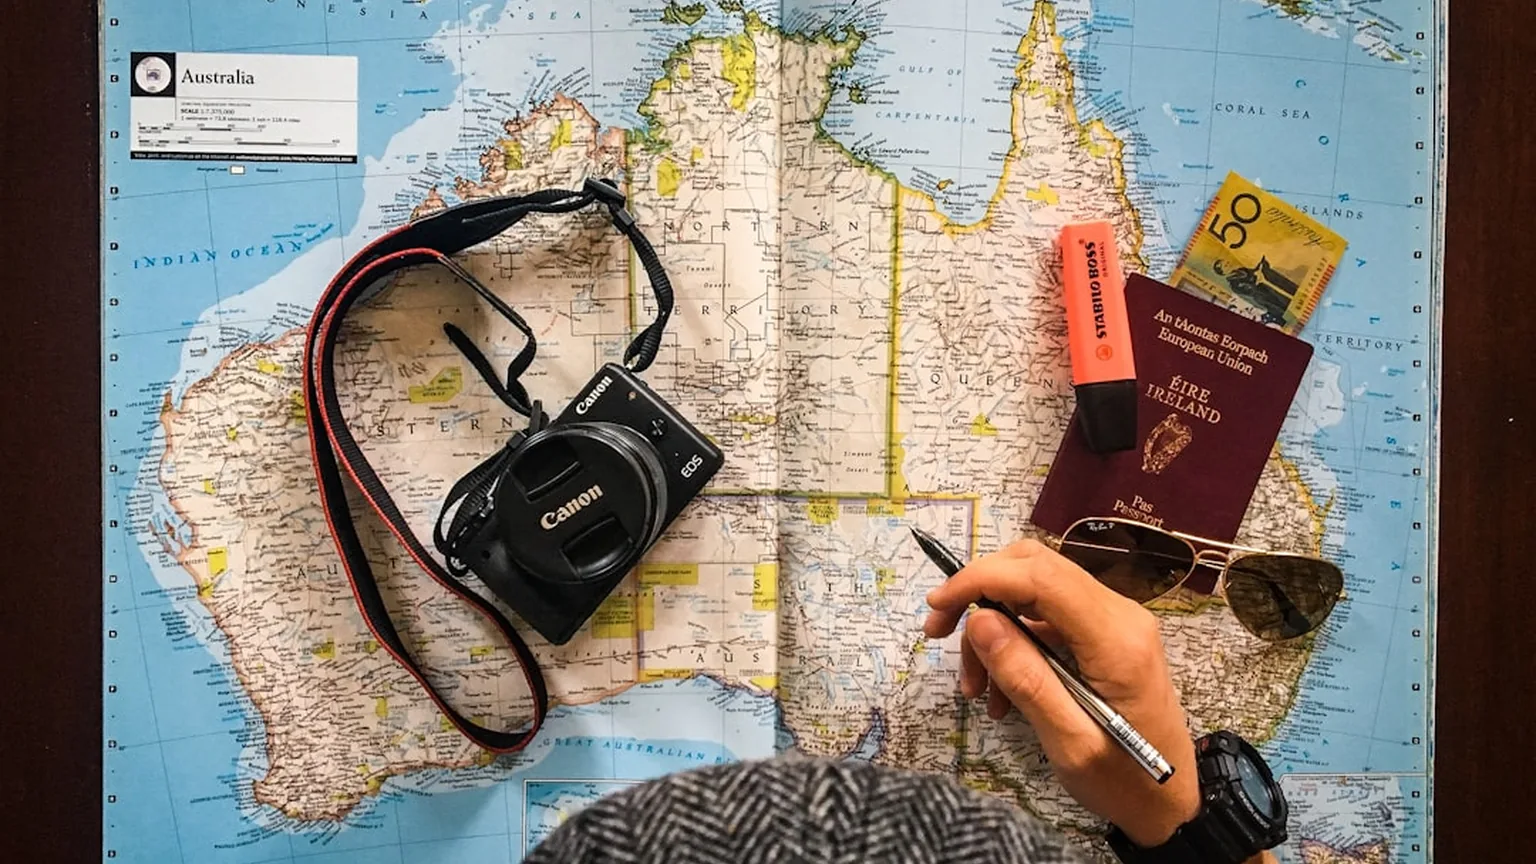
To create a travel itinerary from scratch, follow ten steps: (1) gather the non-negotiable information (dates, booked flights, confirmed accommodation), (2) decide how many “bases” the trip has, (3) break each base into day slots, (4) cluster activities by geography to minimize travel time, (5) slot in the fixed anchors first, (6) fill in the flexible blocks, (7) account for practicalities like transit times and meal slots, (8) document it in a format that actually travels well, (9) review with a critical eye, and (10) leave room for serendipity. Further down you will find a free copy-paste itinerary template with all seven sections a trip plan needs. The blank page is the hardest part — an AI vacation planner skips it entirely.
Quick answer: how to create a travel itinerary
- Step 1 — Lock the frame: dates, destinations, party size, total budget. Everything else flows from these four numbers.
- Step 2 — Book the anchors: flights, accommodation, and any time-locked headline activities (popular restaurants, sold-out tours).
- Step 3 — Cluster by neighborhood: group activities that are geographically close into the same day. Zigzagging across a city eats hours.
- Step 4 — Cap the day at 2 anchors: two committed activities per day, the rest flexible. Over-scheduled itineraries fall apart on day one.
- Step 5 — Time-block, don’t timetable: 2–3 hour blocks with 30–60 minutes of buffer between them; mark lunch and dinner slots.
- Step 6 — Single source of truth: one shared document or app the whole party can see. Copy the template below, or let Vacation Planner generate the entire structure with an AI vacation planning expert.
Learning how to create a travel itinerary from scratch is one of those skills that sounds simple until you actually try it. You open a blank document, stare at it, and realize you have no idea whether Tuesday afternoon should be a museum or a beach day, whether you should book dinner ahead of time, or how long to spend in the old town before moving on. The blank page is where most trip plans die.
The good news is that building a great itinerary follows a repeatable process. Once you know the framework, you can plan a weekend getaway or a three-week international adventure with the same confidence. This guide walks through exactly how to create a travel itinerary from scratch — the research, the structure, the pacing, and the common pitfalls — then shows you how to organize each day with time-blocking, gives you a free template to copy into any document, and explains when it is smarter to let an AI planner draft the whole thing.
What a Good Travel Itinerary Actually Looks Like
Before you start building, it helps to understand what you are aiming for. A good itinerary is not a minute-by-minute script. It is a loose skeleton that tells you:
- Where you will be each day (city, neighborhood, or region)
- Where you are sleeping (with check-in and check-out times)
- The fixed anchors (flights, trains, pre-booked tours, dinner reservations)
- A handful of “if we feel like it” options for the flexible parts of each day
Notice what is missing: hour-by-hour scheduling. The biggest itinerary mistake travelers make is trying to plan every moment. That kills spontaneity, exhausts you, and falls apart the first time a flight is late or a museum is unexpectedly wonderful.
Think of a great itinerary as a trellis, not a cage. It gives your trip structure without constraining it — and even a loose one pays off: you waste less time deciding, you miss fewer must-see spots that need advance tickets, you manage your budget better, and a group trip runs smoother when everyone is looking at the same plan.
Step 1: Gather the Non-Negotiable Information
Before opening any planning tool, collect the fixed pieces of your trip in one place. These will anchor your entire itinerary.
- Flight arrival and departure times (including connections)
- Accommodation check-in and check-out times
- Pre-booked tours, tickets, or reservations (things you have already paid for)
- Time zone differences (especially for the first day — jet lag matters)
- Public transit schedules if you are traveling between cities
- Holiday or event dates that might close attractions or affect prices
- Your research — saved restaurants, attractions, recommendations from friends
Most planning headaches come from this information being scattered across email threads, browser bookmarks, notes apps, and text messages. Consolidating it is the first real step. Start four to six weeks before departure for an international trip and two to four weeks for a domestic one — early enough to book anything that sells out, late enough that details have settled.
These are the constraints your plan must work around. If you ignore them, you will build a beautiful plan that collapses the moment it meets reality.
Step 2: Decide How Many “Bases” Your Trip Has
A base is a place you sleep for multiple nights in a row. The single biggest structural decision in any itinerary is how many bases to have.
One-Base Trips
Sleep in one hotel or rental for the entire trip, doing day trips as needed. This is the most relaxed option. You unpack once, you have a steady routine, and you lose no time to checking in and out of hotels. It works well for week-long trips to a single city or region.
Multi-Base Trips
Two or three bases across a longer trip. A classic example: four nights in Tokyo, three in Kyoto, two in Osaka. You see more places but lose half a day each time you move. A good rule: never stay fewer than two nights anywhere unless the location is directly on the path between two other stops.
Road Trip or Cruise Style
A different base every night. Only worth it for actual road trips or cruises where moving is part of the experience. For most trips, this is exhausting.
Pick the structure before you start planning days. It shapes everything downstream.
Step 3: Break Each Base Into “Day Slots”
Within each base, count your actual usable days. A flight landing at 6 PM on Tuesday is not a full day in Tuesday’s column — it is a “settle in and eat dinner” evening. A departure flight at 10 AM on Sunday eats the entire morning. Mark these half-days explicitly.
For example, four nights in Lisbon with an evening arrival and morning departure gives you:
- Day 1: evening only (dinner, early sleep)
- Day 2: full day
- Day 3: full day
- Day 4: full day
- Day 5: morning only (brunch, travel to airport)
That is really three full planning days, not five. Travelers constantly overestimate how much time they have because they count partial days as full ones. On trips longer than five days, mark a rest day too — it prevents burnout and gives you somewhere to push an activity when a day runs long.
Step 4: Cluster Activities by Geography
This is the single most important principle of a good itinerary: group things that are near each other.
Hopping across a city for breakfast in one neighborhood, a museum in a second, lunch in a third, and an activity in a fourth is exhausting. You spend half your day in transit and miss the serendipity of wandering a specific area.
Instead, pick one neighborhood or district per half-day. Breakfast, morning activity, lunch, and shopping all within a walkable radius. Then move to a different area after a rest. Mornings and afternoons become anchored to places, not individual to-do items.
If you are using a tool like Vacation Planner, the AI vacation planning expert handles this clustering automatically. Tell it your dates, destination, and interests, and it builds a geographically sensible plan that you can tweak rather than starting from zero.
Step 5: Slot In Fixed Anchors First
Now fill in the things that are locked. Flight arrival times, hotel check-ins, tours that require a specific date, concert tickets, a dinner reservation at the one restaurant that takes months to get.
These are non-negotiable. Everything else has to work around them.
A good approach: mark anchors in bold or a different color. This keeps them visually distinct from flexible items, so you never accidentally plan a conflicting activity.
Step 6: Fill in the Flexible Blocks
With anchors set and geography clustered, start adding flexible activities. Aim for:
- One or two planned activities per day. More than that and you are racing.
- One meal anchor per day. Book or bookmark one restaurant for lunch or dinner; let the others happen organically. For the other meals, just note the area you will be in.
- Open afternoons or mornings. Leave at least one major block per day unscheduled.
This pacing feels sparse when you are planning from home, surrounded by lists of “amazing things to do in [city].” Trust the process. Once you are actually on the trip, you will be grateful for every empty block.
Organizing Each Day: Time-Blocking and Daily Rhythm
Steps 1 through 6 give you the skeleton of the trip. Organizing the inside of each day is a separate skill, and the method that works best for travel is time-blocking: assigning rough windows to activities rather than minute-by-minute times. It provides structure without fragility.
Set Your Daily Rhythm First
Before scheduling anything, be honest about how you actually travel:
- Early bird or late riser? Do not schedule a 7 AM walking tour if you know you will not enjoy it.
- When is your energy highest? Save physically demanding activities for that window; put indoor or low-key stops in your usual slump period.
- How do you handle meals? Some people plan every restaurant; others want to wander. Knowing which you are determines how much structure your evenings need.
Time-Blocking Rules That Hold Up on the Ground
- Use 2–3 hour blocks. Most attractions, meals, and transit legs fit inside this window.
- Leave 30–60 minutes of buffer between blocks for transitions, unexpected discoveries, or simply sitting in a cafe. Between cities, budget far more.
- Front-load priorities. Put must-do activities earlier in the day and earlier in the trip, when energy and enthusiasm are highest.
- Mark “moveable” items. Tag anything without a set time so you can shift it if something runs long or you find something better.
- Give each block a backup. One indoor alternative per outdoor block is enough to keep a rainy morning from derailing the day.
The Shape of a Well-Organized Day
A day that follows this pattern needs very little else:
- Morning: primary activity, travel time from your accommodation, a backup if it is closed or too crowded
- Midday: lunch spot or the area to find food, then a short rest or a low-effort stop
- Afternoon: secondary activity or free exploration; any pre-booked experience with a set time
- Evening: dinner plan or neighborhood to explore; one evening activity or downtime
- Logistics line: transport needed, items to carry (tickets, specific clothing), estimated cost for the day
The copy-paste template later in this guide turns this pattern into a fill-in-the-blanks day block.
Step 7: Account for Practicalities
A beautiful plan that ignores practical realities is useless. Sanity-check each day against:
- Opening hours. That must-see market is closed on Mondays. That restaurant opens at 8 PM.
- Booking windows. Popular tours sell out. Book two to four weeks ahead for peak season.
- Travel time between stops. Google Maps underestimates walking time for tired travelers — the “15 minutes” between two attractions is often 45 once you add walking to the station, waiting, and finding your way at the other end.
- Rest. Jet lag, time changes, and walking fatigue are real. Build in rest or easy days.
- Weather. Plan indoor alternatives for outdoor activities.
For each activity you keep, note the address, the opening days and hours, whether it needs a ticket or timed entry, roughly how long it takes, and the best way to get there. This looks like overkill during planning; on the ground it eliminates the constant Googling that fragments a day.
Our vacation planning checklist covers the full list of practicalities to think through before departure — documents, health prep, packing considerations — that complement the itinerary itself.
Step 8: Document in a Format That Actually Travels Well
A brilliant itinerary you cannot pull up on your phone at 7 AM on day three is no use. How you store the plan matters almost as much as what is in it.
Options for storing your itinerary
- A dedicated planning app like Vacation Planner: bookings, activities, and budget in one place, accessible on your phone, and shareable as a view-only plan with travel companions. The AI drafts the first version so you start from a plan instead of a blank page.
- A spreadsheet (Google Sheets or Excel): columns for date, time, activity, location, cost, and notes. Completely flexible, but tedious to build and awkward on a phone. Dedicated apps vs spreadsheets explains why a purpose-built tool wins for anything beyond a weekend trip.
- A shared Google Doc or Notion page: fine for simple trips; the template below is designed to be pasted into one. You build the structure yourself and lose travel-specific features like budget tracking.
- A printed PDF: useful as a backup if connectivity is patchy, but it cannot be updated when plans change.
Whatever you pick, it should show the day’s anchors up top, include addresses and confirmation numbers, and be reachable when your data is spotty abroad.
Step 9: Review With a Critical Eye
Before you finalize, read through the whole itinerary once as if you were the traveler, not the planner. Ask:
- Does each day have breathing room, or am I exhausted just reading it? More than three major activities in a day, or back-to-back blocks with no buffer, means cut one.
- Are the mornings and evenings grouped sensibly, or am I crossing town five times?
- Do the logistics actually work? Does the last metro run late enough for the evening plan? Do opening hours overlap with when you have scheduled the visit? Is anything closed for renovation or the season?
- Do I have backup plans for weather or closed venues?
- Have I budgeted enough time for meals, not just activities?
- Is the mix balanced? Three museum days in a row cause museum fatigue no matter how much you love art. Alternate active and relaxing, indoor and outdoor, cultural and recreational.
- Is there at least one slow morning or lazy afternoon?
If anything feels off, cut. It is almost always better to remove than to add. If you are traveling with others, share the draft now and ask for input — it is far easier to adjust at this stage than to debate it over breakfast on day three.
Step 10: Leave Room for Serendipity
The best travel memories are rarely the ones you planned. They are the bakery you stumbled into, the viewpoint you found on a wrong turn, the locals who invited you for a drink. If your itinerary is so packed that you cannot deviate, you are optimizing for efficiency at the cost of joy.
A simple rule: schedule about 60 percent of your time. Leave the other 40 percent open. You will fill it as the trip unfolds.
A Free Travel Itinerary Template You Can Copy
If you would rather start from a structure than a blank page, the template below covers everything a trip plan needs. Copy it into a Google Doc, Notion page, Word document, or any shared note. It is intentionally plain — fancy formatting works against you when you are trying to find the hotel address one-handed in the back of a taxi.
A complete itinerary template has seven sections:
- Trip header — destination, dates, travelers, primary contact
- Flights and transport — carriers, confirmation numbers, arrival and departure times
- Accommodation — addresses, check-in and check-out times, confirmation numbers, host contacts
- Day-by-day plan — morning, afternoon, evening with times and addresses
- Budget tracker — estimated and actual costs by category
- Pre-trip checklist — the admin that has to happen before you leave
- Emergency info — local emergency numbers, embassy, insurance details
Build the skeleton first: drop in the header, one empty day block per day, the budget table, and the checklist before you research anything. An empty structure makes it obvious what is still missing, and it stops you from spending three weeks perfecting day one.
Header
VACATION: [Destination]
Dates: [Start date] – [End date]
Travelers: [Names]
Primary contact: [Name and phone number]
Trip purpose: [Honeymoon / family vacation / solo / etc.]
Flights and Transport
| Direction | Date | Carrier / flight # | Departs | Arrives | Confirmation # |
|---|---|---|---|---|---|
| Outbound | |||||
| Return |
Add rows for connecting flights, trains, or ferries, plus local transport notes — rental car pickup, airport transfer, the metro card to buy on arrival.
Accommodation
PROPERTY: [Hotel or rental name]
Address: [Full address]
Check-in: [Day and time]
Check-out: [Day and time]
Confirmation #: [Booking reference]
Host / front desk: [Name and phone]
Wi-Fi: [Network] / [Password]
Notes: [Parking, access codes, breakfast included, etc.]
Repeat the block for each property on a multi-base trip.
Day-by-Day Plan
Repeat this block for each day:
DAY [#] – [Date, Day of week]

Morning
- [Time]: [Activity, address, confirmation # if booked, estimated cost]

Afternoon
- [Time]: [Activity, address, confirmation # if booked, estimated cost]

Evening
- [Time]: [Activity, address, confirmation # if booked, estimated cost]

Notes: [Weather backup, dress code, transport, things to carry]
The notes line is the most underrated part of the template. It is where “bring swimsuit,” “restaurant requires long trousers,” and “museum closed Mondays — moved to Tuesday” live. Write addresses and times, not just names: “Lunch at Trattoria Sostanza, Via del Porcellana 25r, 12:30 reservation, no credit cards” saves you from frantic phone-tapping ten minutes before the booking.
Budget Tracker
| Category | Estimated | Actual | Notes |
|---|---|---|---|
| Flights | |||
| Accommodation | |||
| Local transport | |||
| Food and drink | |||
| Activities | |||
| Shopping / gifts | |||
| Buffer (10–15%) | |||
| Total |
Update the actuals during the trip — a rough running tally beats reconstructing what you spent after you get home. Our vacation budget guide goes deeper on building a realistic number.
Pre-Trip Checklist
- [ ] Passport valid 6+ months past return date
- [ ] Visa secured (if needed)
- [ ] Travel insurance booked
- [ ] Notify bank / credit card of travel
- [ ] Currency or travel card sorted
- [ ] Vaccinations up to date
- [ ] Driver's licence / IDP (if renting a car)
- [ ] Phone plan or eSIM arranged
- [ ] Pet sitter / mail hold / plant watering
- [ ] Out-of-office email set
- [ ] Boarding passes downloaded
- [ ] Itinerary shared with someone at home
Emergency Info
Local emergency number: [e.g. 112, 911]
Nearest hospital: [Name, address]
Nearest pharmacy: [Name, address]
Embassy / consulate: [If traveling internationally]
Insurance: [Provider, policy #, claims phone]
Credit card lost-card line: [Phone number]
Keep the header, accommodation, and transport sections at the top of the document. If you have to scroll past three days of activities to find the Airbnb access code, the template is broken.
Template or AI Planner?
A template gives you structure. It does not decide what to do, where to eat, or how to sequence a city so you are not crisscrossing it six times a day. A few rules of thumb:
- Use the template when the trip is short and simple (a long weekend in a city you know), when you genuinely enjoy the planning craft, or when you will be offline.
- Use an AI planner when the destination is new, planning time is short, you have firm constraints (budget cap, accessibility, dietary), or you want a concrete draft to react to instead of a blank page.
- Use both when you want an AI-generated draft as the starting point and then copy it into a personal template with your own notes and rituals.
Adapting the Itinerary by Trip Type
The framework above is universal, but the emphasis shifts with the kind of trip.
City Break (2–4 Days)
Organize by neighborhood rather than by attraction: one area per half-day. Reserve one meal per day at a specific restaurant and leave the others flexible. Schedule the most popular sights for early morning or late afternoon to dodge peak crowds.
Beach or Resort Vacation (5–7 Days)
Keep it loose: a morning activity, an afternoon at the beach or pool, an evening dinner plan. Pre-book one or two excursions to break up the beach days, and focus your notes on reservations rather than hourly schedules.
Multi-City Trip (7–14 Days)
Give each city its own set of day blocks, and treat transit days as itinerary entries in their own right with realistic time estimates. Front-load the must-see activities in each city in case plans slip.
Road Trip
Organize around driving segments and overnight stops rather than days, with fuel stops, rest areas, and worthwhile detours noted along each leg. Our road trip planning guide covers route-based itineraries in detail.
Group Trip
Build the plan collaboratively, then mark which activities are group commitments and which are optional. Include explicit “together time” and “free time” blocks so people with different interests can split off without guilt. Our group trip itinerary template is built around exactly this problem.
Solo Trip
Organize around a single base so you are not managing luggage and unfamiliar arrivals repeatedly. Cluster each day so the evening ends within walking distance of where you sleep, note the last train or bus time for anything outside the centre, and share the finished plan with one person at home. Our safety-first guide to solo female travel itinerary planning covers base selection, arrival timing, and accommodation vetting in depth.
Common Mistakes When You Create a Travel Itinerary From Scratch
A few patterns consistently ruin otherwise promising itineraries. Watch for these:
- Treating the itinerary as a wishlist. If day one has eleven items, you have captured everything you read about, not what you will actually do. Pick the top two or three and let the rest go.
- Booking too many pre-paid activities. Every prepaid ticket is a constraint on your time. Book the ones that genuinely need booking — one dinner reservation a day is plenty — and leave the rest flexible.
- Ignoring travel time. That “easy” train between two regions can eat half a day once you account for getting to the station, the journey, and finding your new accommodation. Within a city, a 5 PM tour ending and a 5:30 reservation thirty minutes away is a math problem, not a plan.
- Assuming you will wake up early. You will not, especially with jet lag. Keep the first day after a long flight light and plan mornings for your realistic wake time.
- Not researching meals. Great restaurants often need reservations, and wandering hungry into a tourist trap at 2 PM is a preventable mistake. Bookmark two or three per city.
- Having no rainy-day backup. Two or three indoor alternatives per destination keep a bad forecast from wiping out a day.
- Burying the essentials. Hotel address, Wi-Fi password, and airport transfer details belong at the top of the document, not on page nine.
- Not sharing it. Give at least one person at home access to your flights, accommodation, and emergency info. It is the cheapest insurance you will ever buy.
- Treating the itinerary as final. The plan exists to be adjusted. If changing one activity forces you to reschedule the whole day, it was too tight to begin with.
Using the Itinerary During the Trip
An itinerary only earns its keep if you actually open it once you are away:
- Review the next day’s plan each evening. Ten minutes of review prevents morning confusion and lets you swap indoor and outdoor blocks against the forecast.
- Keep it on your phone, in an app or a pinned document — not buried in your files.
- Update it live. If a reservation moves or you skip something, change the plan. An itinerary that diverges from reality stops being trusted, and an itinerary nobody trusts is one nobody opens.
- Do not stress about deviations. The itinerary is a guide, not a contract. The best moments usually come from going off-script.
A Faster Alternative: Use an AI Vacation Planning Expert
The step-by-step process above is how you build a great itinerary from scratch, and the template gives you somewhere to put it. But “from scratch” is not the only option. An AI vacation planning expert can do the heavy lifting in minutes. You tell it where you are going, for how long, and what you like. It returns a complete, geographically clustered, realistically paced itinerary that you then refine.
The gap between a template and an AI draft comes down to five things:
- Speed. A template takes hours to fill in once the research is done. An AI itinerary generates in minutes.
- Sequencing. The AI clusters activities geographically, so you are not spending an hour in transit between every stop.
- Personalization. The output reflects your actual interests — food-focused, outdoorsy, slow-paced, museum-heavy — rather than a generic tourist list.
- Iteration. Ask for “more food, fewer museums” or “swap day three for a beach day” and the plan updates, instead of you re-editing a document.
- Built-in logistics. In Vacation Planner, the itinerary lives alongside your flights, accommodation, and budget, and you can share the plan with companions as a view-only link so everyone sees the same version.
The free plan covers one complete vacation — and one vacation can include as many destinations, flights, and hotels as your trip actually has. The $4.99/month plan is built for people who travel more than once a year: it adds multiple separate trips, the annual vacation calendar, and email sync.
This does not replace the process in this article. It speeds up the drafting step and lets you spend your planning time on the parts that actually require human judgment: what you care about, who you are traveling with, and how you want the trip to feel. For a broader look at this category, see our best AI trip planner comparison.
Frequently Asked Questions
How do you start a travel itinerary from scratch?
Start with the non-negotiable information: flights, accommodation check-in and check-out times, and anything you have already booked. Then decide how many “bases” your trip has and count your actual usable days per base. Build the itinerary around those anchors, clustering activities geographically within each day.
How detailed should a travel itinerary be?
A good itinerary includes your sleeping location, fixed anchors (flights, tours, reservations), and one or two planned activities per day, each with an address, opening hours, and any booking details. It should not schedule every hour. Aim to plan about 60 percent of your time and leave 40 percent open for spontaneity and rest.
How many activities should you plan per day?
One or two planned activities per day is the sweet spot; three is the ceiling. More than that and you will feel rushed. Cluster activities in the same neighborhood so you are not crossing the city multiple times, and leave a major block of each day unscheduled for meals, wandering, or rest.
Should I plan every meal on my itinerary?
No. Booking or bookmarking one meal per day, usually dinner, is a good balance. For breakfast and lunch, note the general area you will be in so you can find something nearby. Over-planning meals removes the fun of discovering restaurants organically.
Is there a free travel itinerary template?
Yes. The template in this guide is free to copy into a Google Doc, Notion page, Word document, or any shared note — no signup needed. It covers the seven sections every itinerary needs: header, flights and transport, accommodation, day-by-day plan, budget tracker, pre-trip checklist, and emergency info. If you would rather not maintain a document, Vacation Planner’s AI drafts the itinerary for you. The free plan covers one complete vacation — and one vacation can include as many destinations, flights, and hotels as your trip actually has. The $4.99/month plan is built for people who travel more than once a year: it adds multiple separate trips, the annual vacation calendar, and email sync.
What is the best format for a travel itinerary?
A dedicated planning app like Vacation Planner works best for anything longer than a weekend. It keeps bookings, activities, budget, and dates in one place on your phone and can be shared with travel companions as a view-only plan. A shared Google Doc or Notion page using the template above works for simple trips, and a printed copy makes a good backup.
What is the difference between an itinerary template and an AI trip planner?
A template is a blank structure you fill in manually from your own research. An AI trip planner generates a personalized itinerary from your destination, dates, interests, and budget, so you start with a concrete draft to refine instead of a blank page. Templates give you control; AI gives you speed and sensible sequencing. Many travelers start with an AI draft and then refine it.
How far in advance should you create a travel itinerary?
Start rough planning as soon as you decide on dates. Begin building the day-by-day plan four to six weeks before an international trip and two to four weeks before a domestic one, and finalize it about two weeks out. This leaves enough time to book tours or restaurants that require advance reservations, but not so much time that your plan becomes rigid before conditions settle.
Can AI create a travel itinerary for me?
Yes. An AI vacation planning expert like Vacation Planner generates a complete draft itinerary in under a minute based on your destination, dates, and interests. You then refine the plan rather than building from scratch. This saves hours of research and handles the tedious clustering and pacing work.
Can I share my travel itinerary with my travel companions?
Yes. A Google Doc or Notion page can be shared with view or comment access. In Vacation Planner, you can share the itinerary with travel companions or family as a view-only plan so everyone sees the same up-to-date version — this is read-only sharing, not collaborative editing, which keeps a single source of truth and prevents conflicting edits.
Should you book activities in advance or play it by ear?
Book the activities that genuinely require advance reservations — popular tours, famous restaurants, limited-entry attractions. Leave the rest flexible. Every pre-booked item is a constraint on your time, so only commit to the ones that are likely to sell out.